
A beginner’s guide to setting up Home Assistant

Setting up a smart home involves a maze of competing standards and the need for hubs, dongles, and multiple apps to manage everything. It’s honestly exhausting, but there is a better way. No, it’s not filling your home with smart speakers to interface with the apps for you, although that is one option. There’s one system to rule them all, and it’s called Home Assistant. Able to run as a full-fledged operating system or as a Docker container, this fantastic smart home management tool ties into thousands of other companies’ APIs, so you can automate your smart home in a system you control.

Related
What you’ll need
Home Assistant can be installed in multiple ways
Before you get started on your simplified smart home journey, you’re going to need a few things.
- A device to run Home Assistant on: You can get a ready-made hardware system from HA, use a SBC, a NAS, or any x86-64 computer hardware
- A formatted flash drive with at least 8GB of capacity: This is only needed if you’re installing Home Assistant as the OS on your computer
- Virtualization software: If you prefer to use a virtual machine for Home Assistant, you will need to install software like VirtualBox or VMware Workstation Player
- A second computer or phone: To access the Home Assistant server once installed to set up configurations
Installing Home Assistant OS
This is the version with the most utility

Link Image
Running Home Assistant OS (HAOS) is the best way to use it, as you get access to every feature, including add-ons and one-click updates. That means we’re going to install HAOS on a laptop, and it’s really no different from installing any other operating system, with one twist we’ll explain in a minute.
Create an Ubuntu flash drive
The officially supported way of installing HAOS is to use a live Ubuntu USB, download a disk image of HAOS, and use the live environment to restore that disk image to the drive of the PC we are going to use with HAOS. It sounds complex, but it’s really quite straightforward.
This will overwrite any data on your USB drive, so back it up if you have anything important on it.
- Download the latest version of Ubuntu from the official website.
- Download the latest version of Ubuntu from the official website.
- Insert the flash drive into your PC.
- Open Rufus, and under Boot selection, make sure it reads Disk or ISO image, then click SELECT.
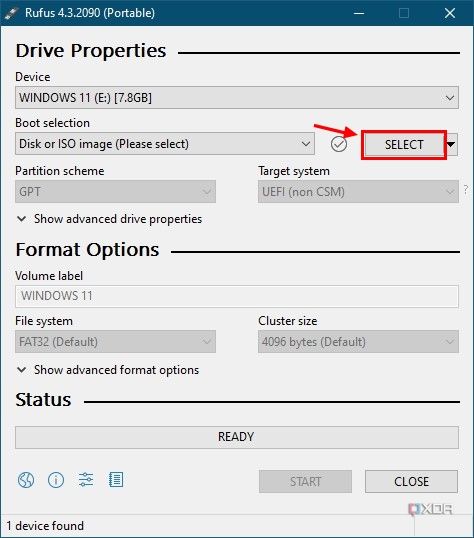
- Browse to the Ubuntu image you downloaded in step 2 and select it.
- Select START and wait for Rufus to create the bootable USB.

Now it’s time to boot into that live USB and get HAOS installed.
Boot into live Ubuntu
Now it’s time to get HAOS ready to roll.
- Put the USB drive into the computer we’re going to use for HAOS and reboot it.
- Press the keyboard key to access your computer’s boot options. Depending on your machine, this could be F12, F11, F10, Esc, or Del.
- Select the USB drive you plugged in from the list that appears.
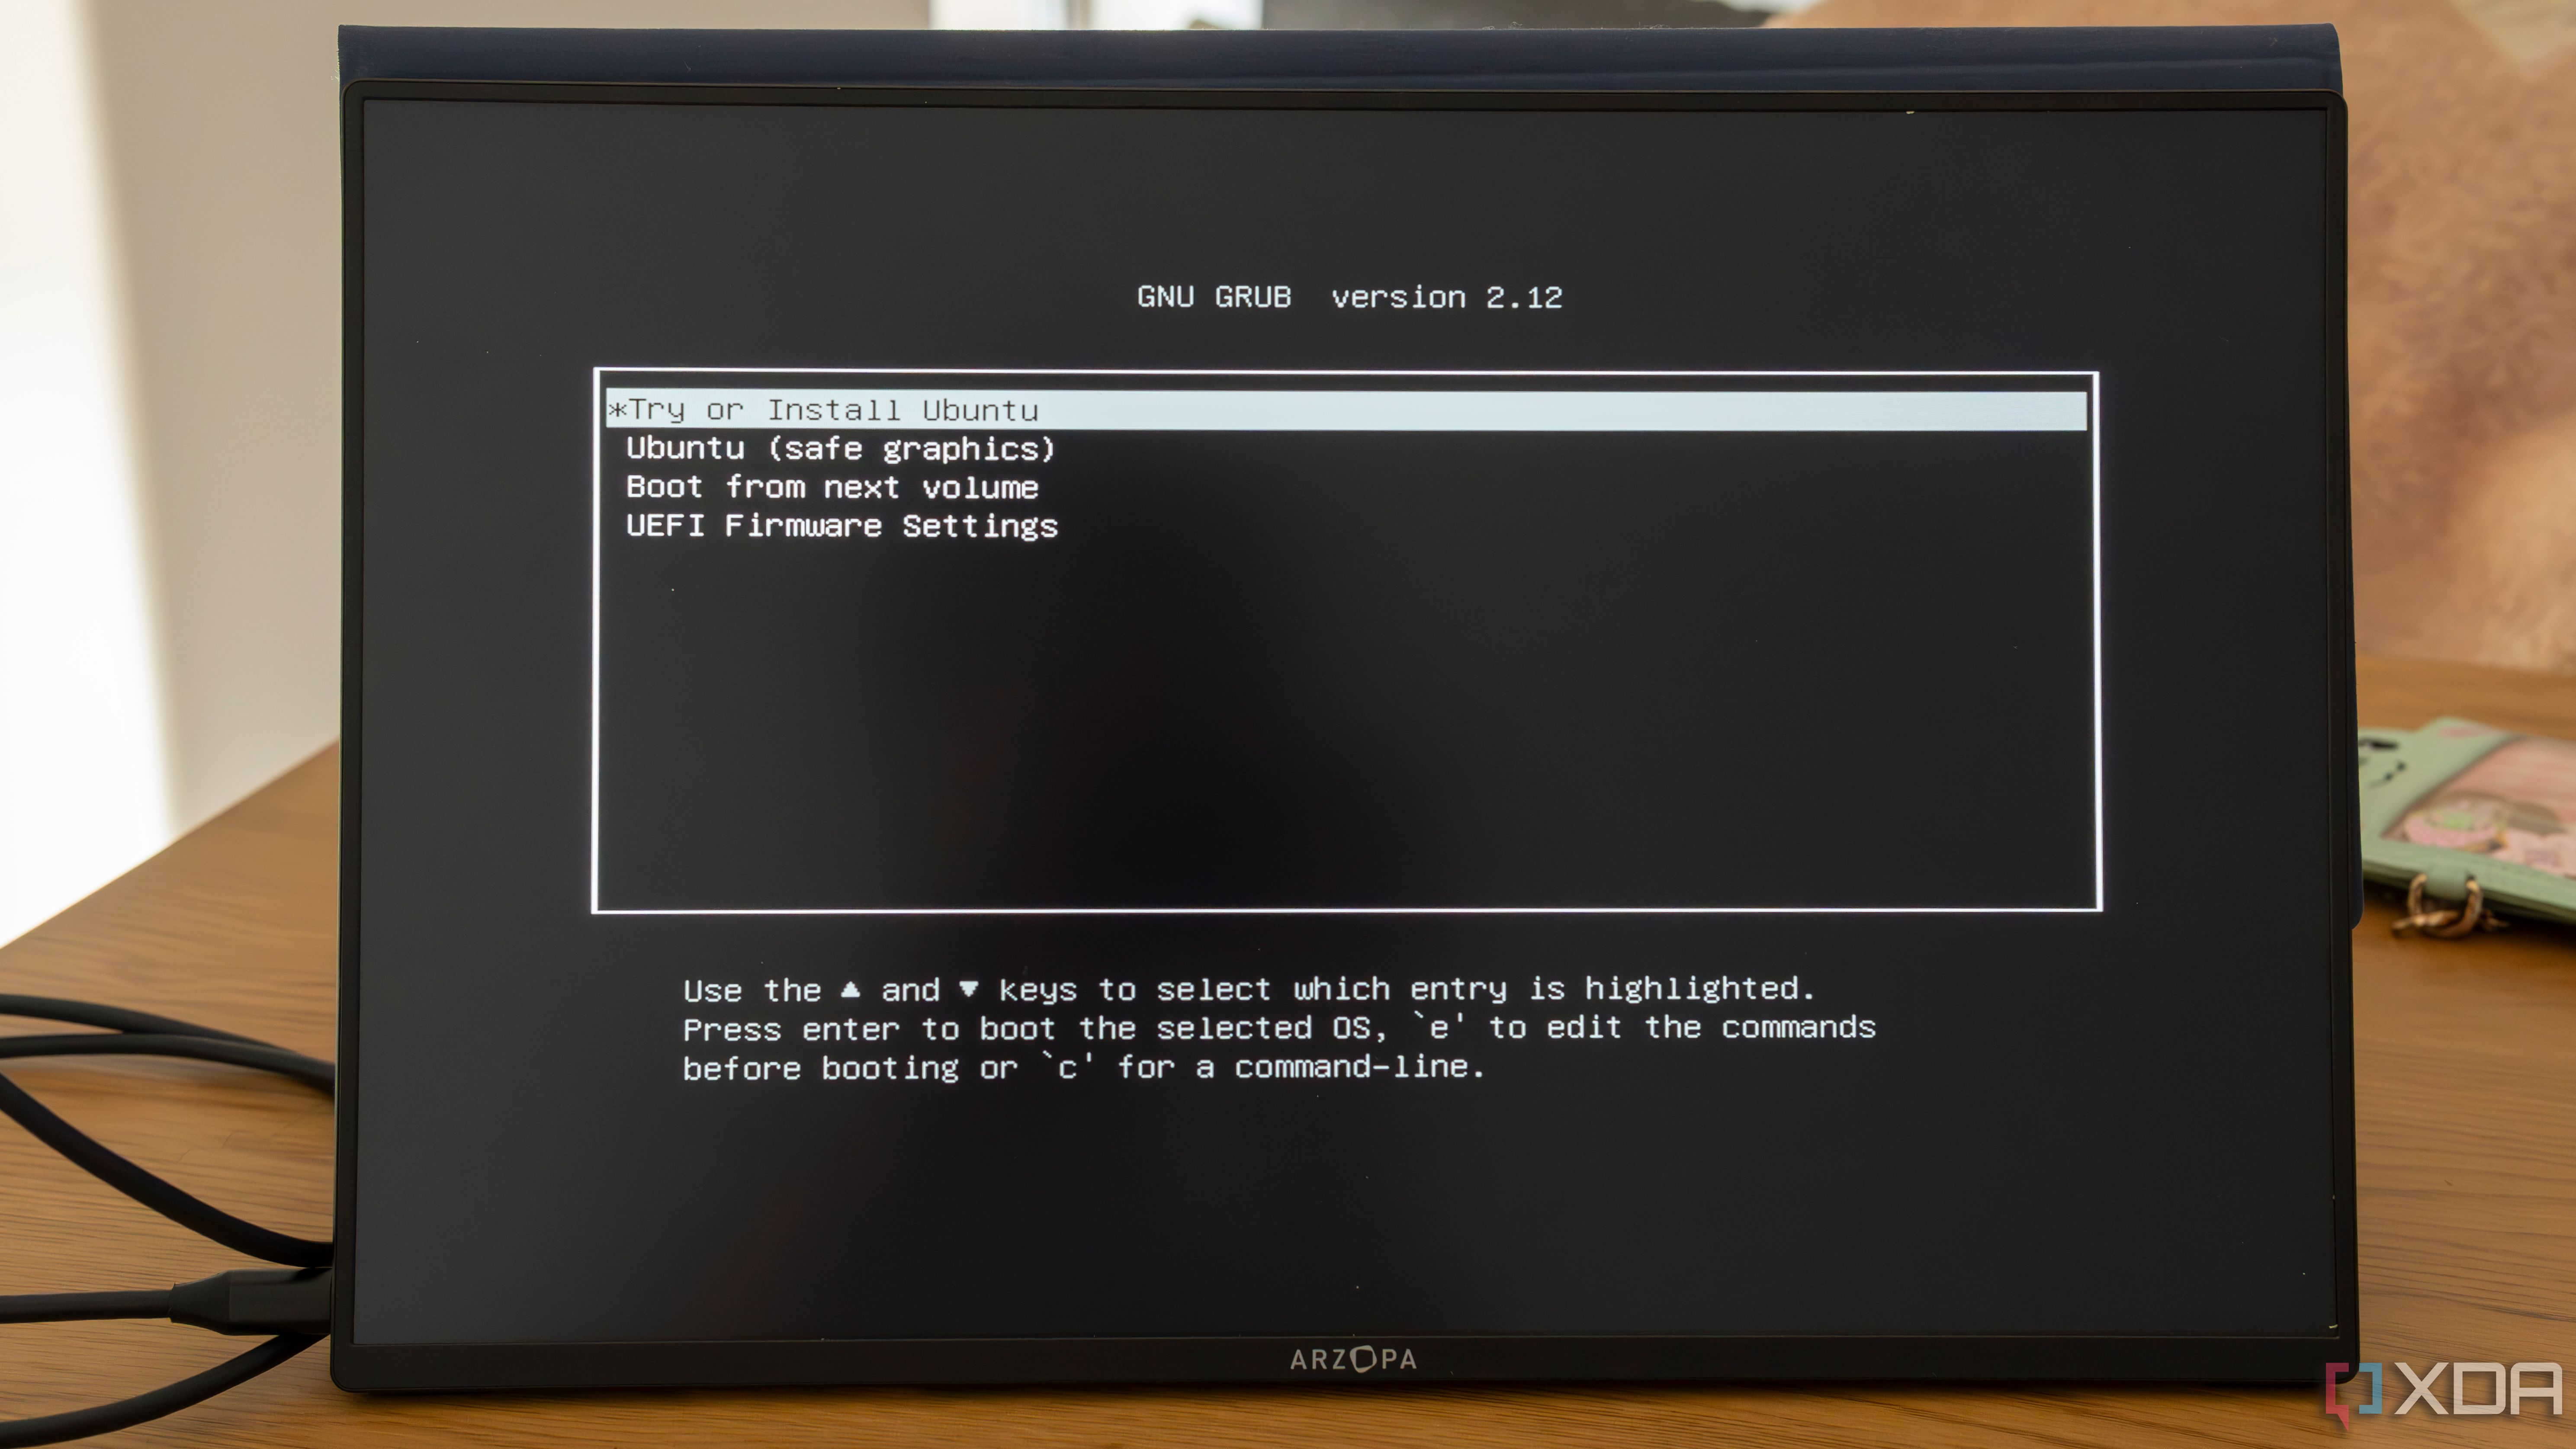
- Once booted, you’ll see a menu for installing Ubuntu. Select Try or install Ubuntu, and press Enter.
- Follow the setup process until you get to the desktop, including connecting to the internet.

- Launch Firefox, navigate to this article, and download the HAOS image from the GitHub page.
- Open the Applications menu in the bottom left corner, search for Disks, and open the tool.
- Once the Disks tool opens, select the main drive on your PC.
- Select the three-dot button, and select Restore Disk Image.
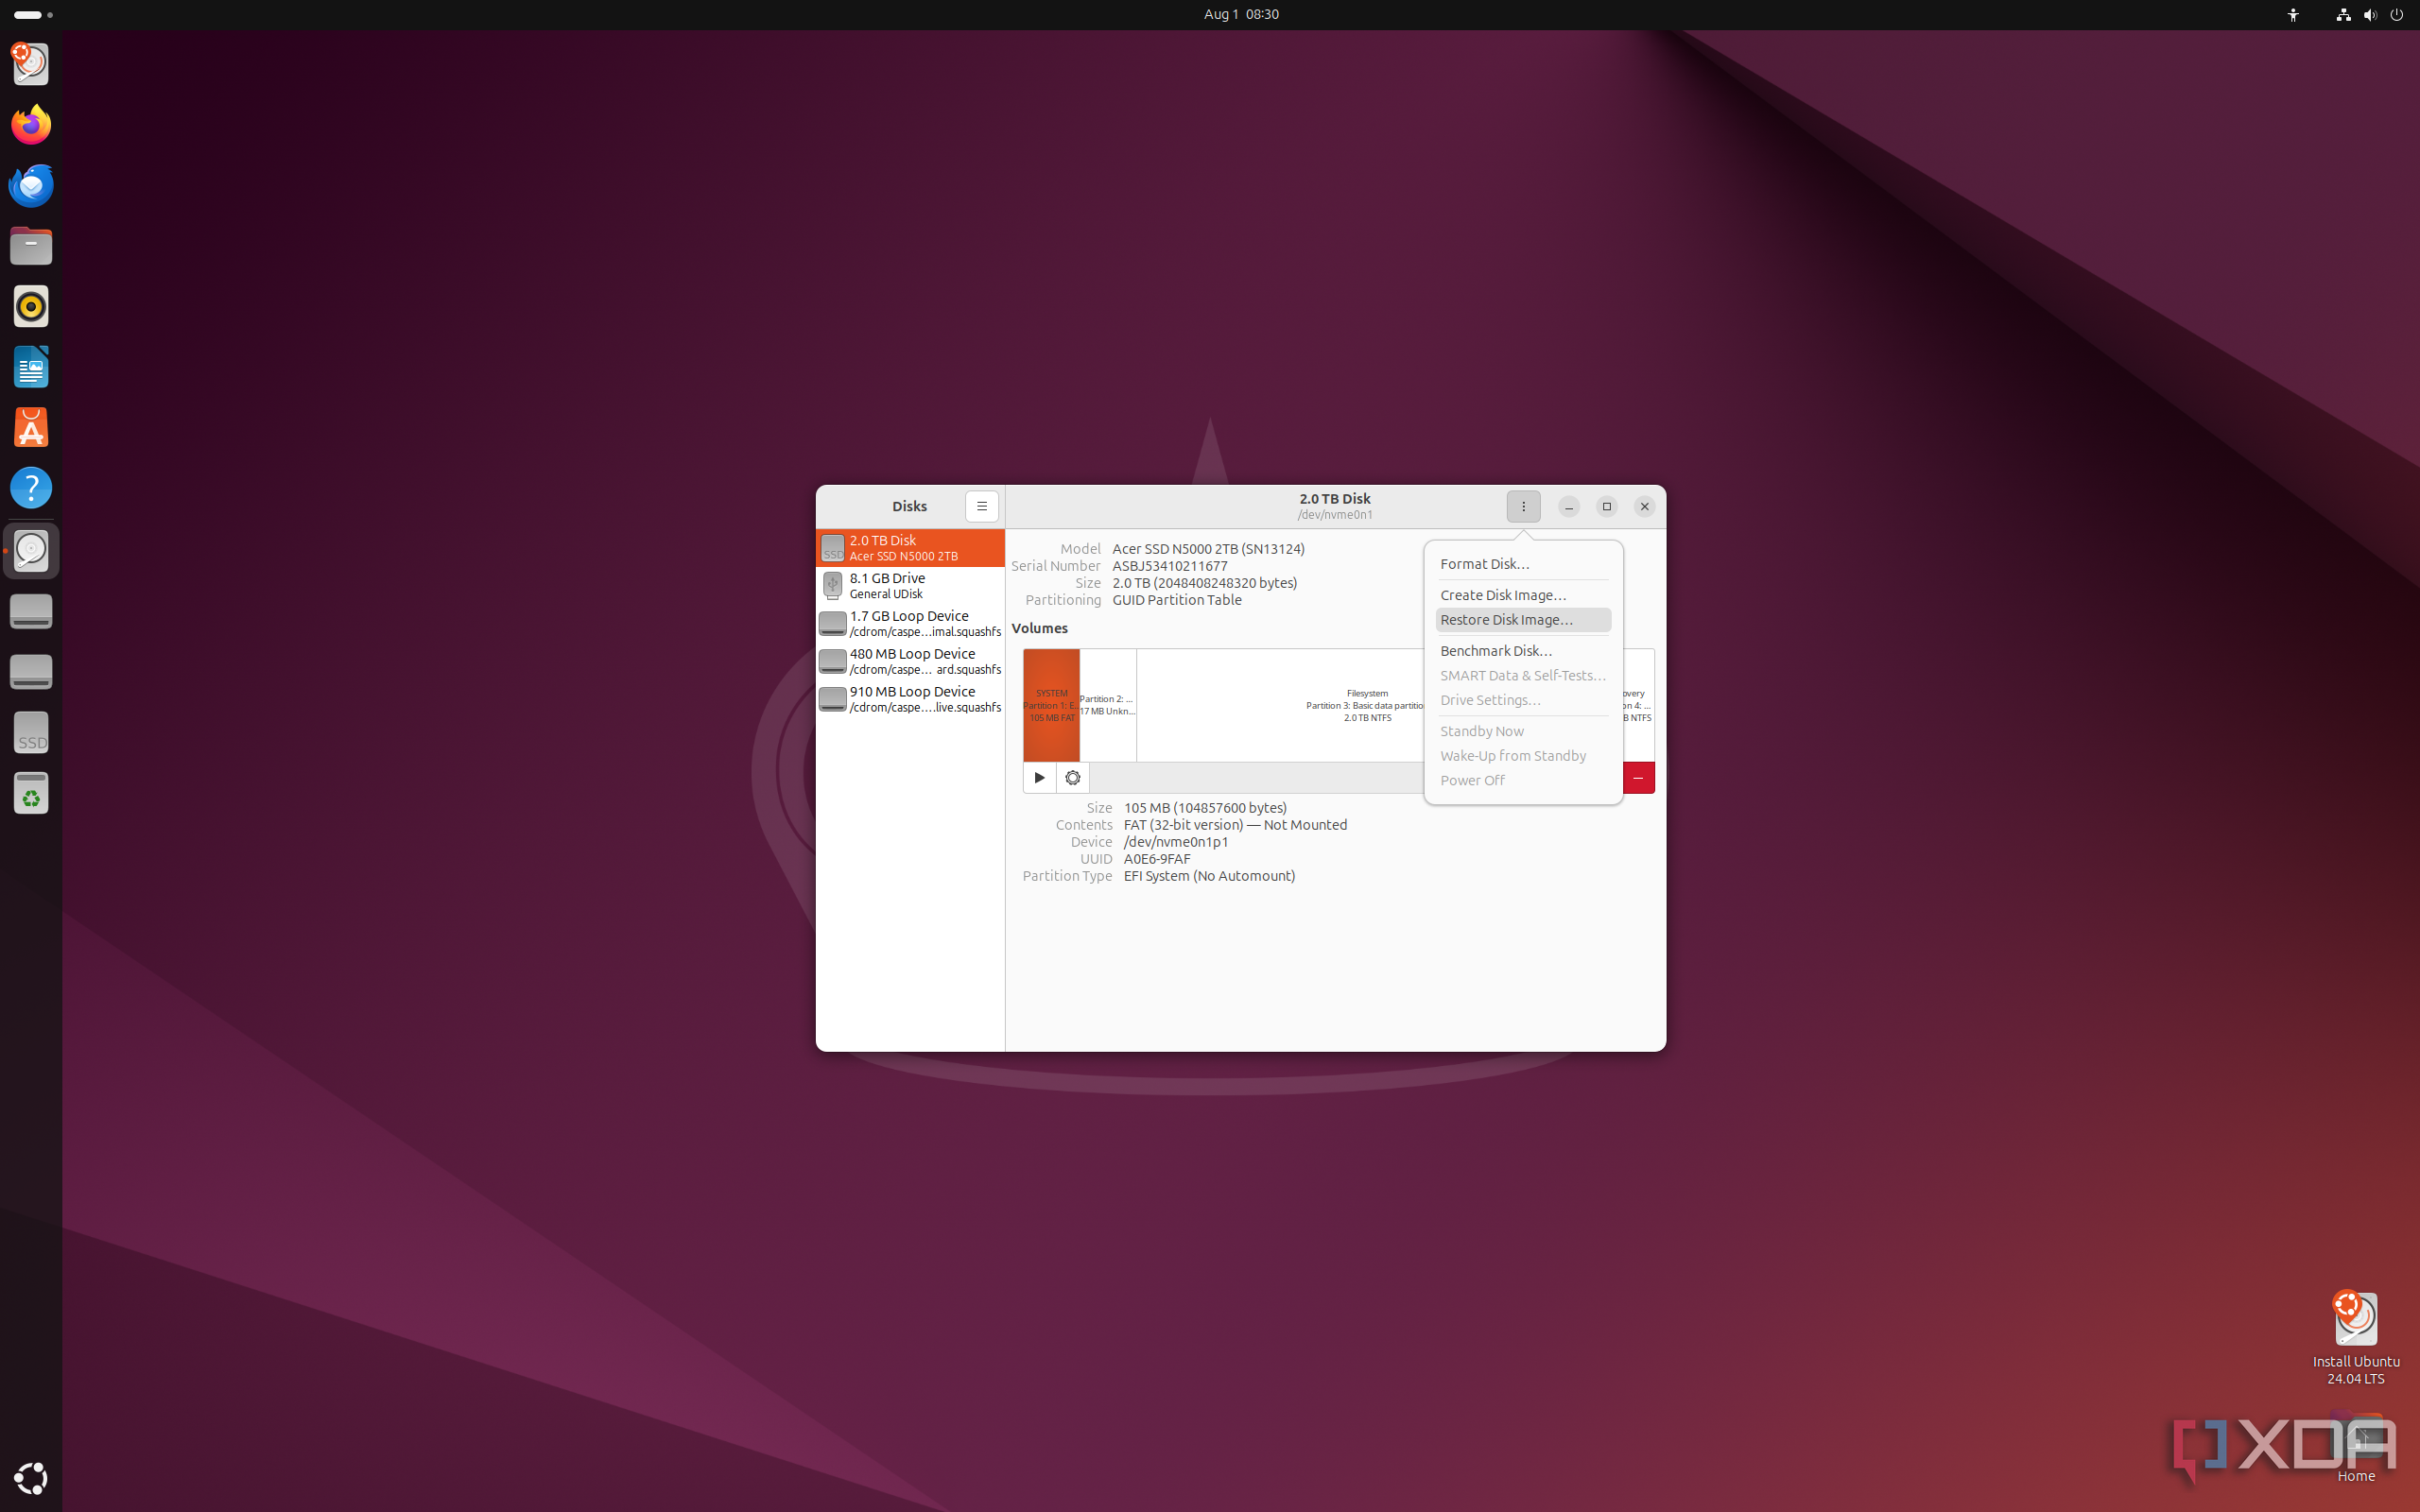
- Select the image you downloaded from GitHub and select Start restoring.
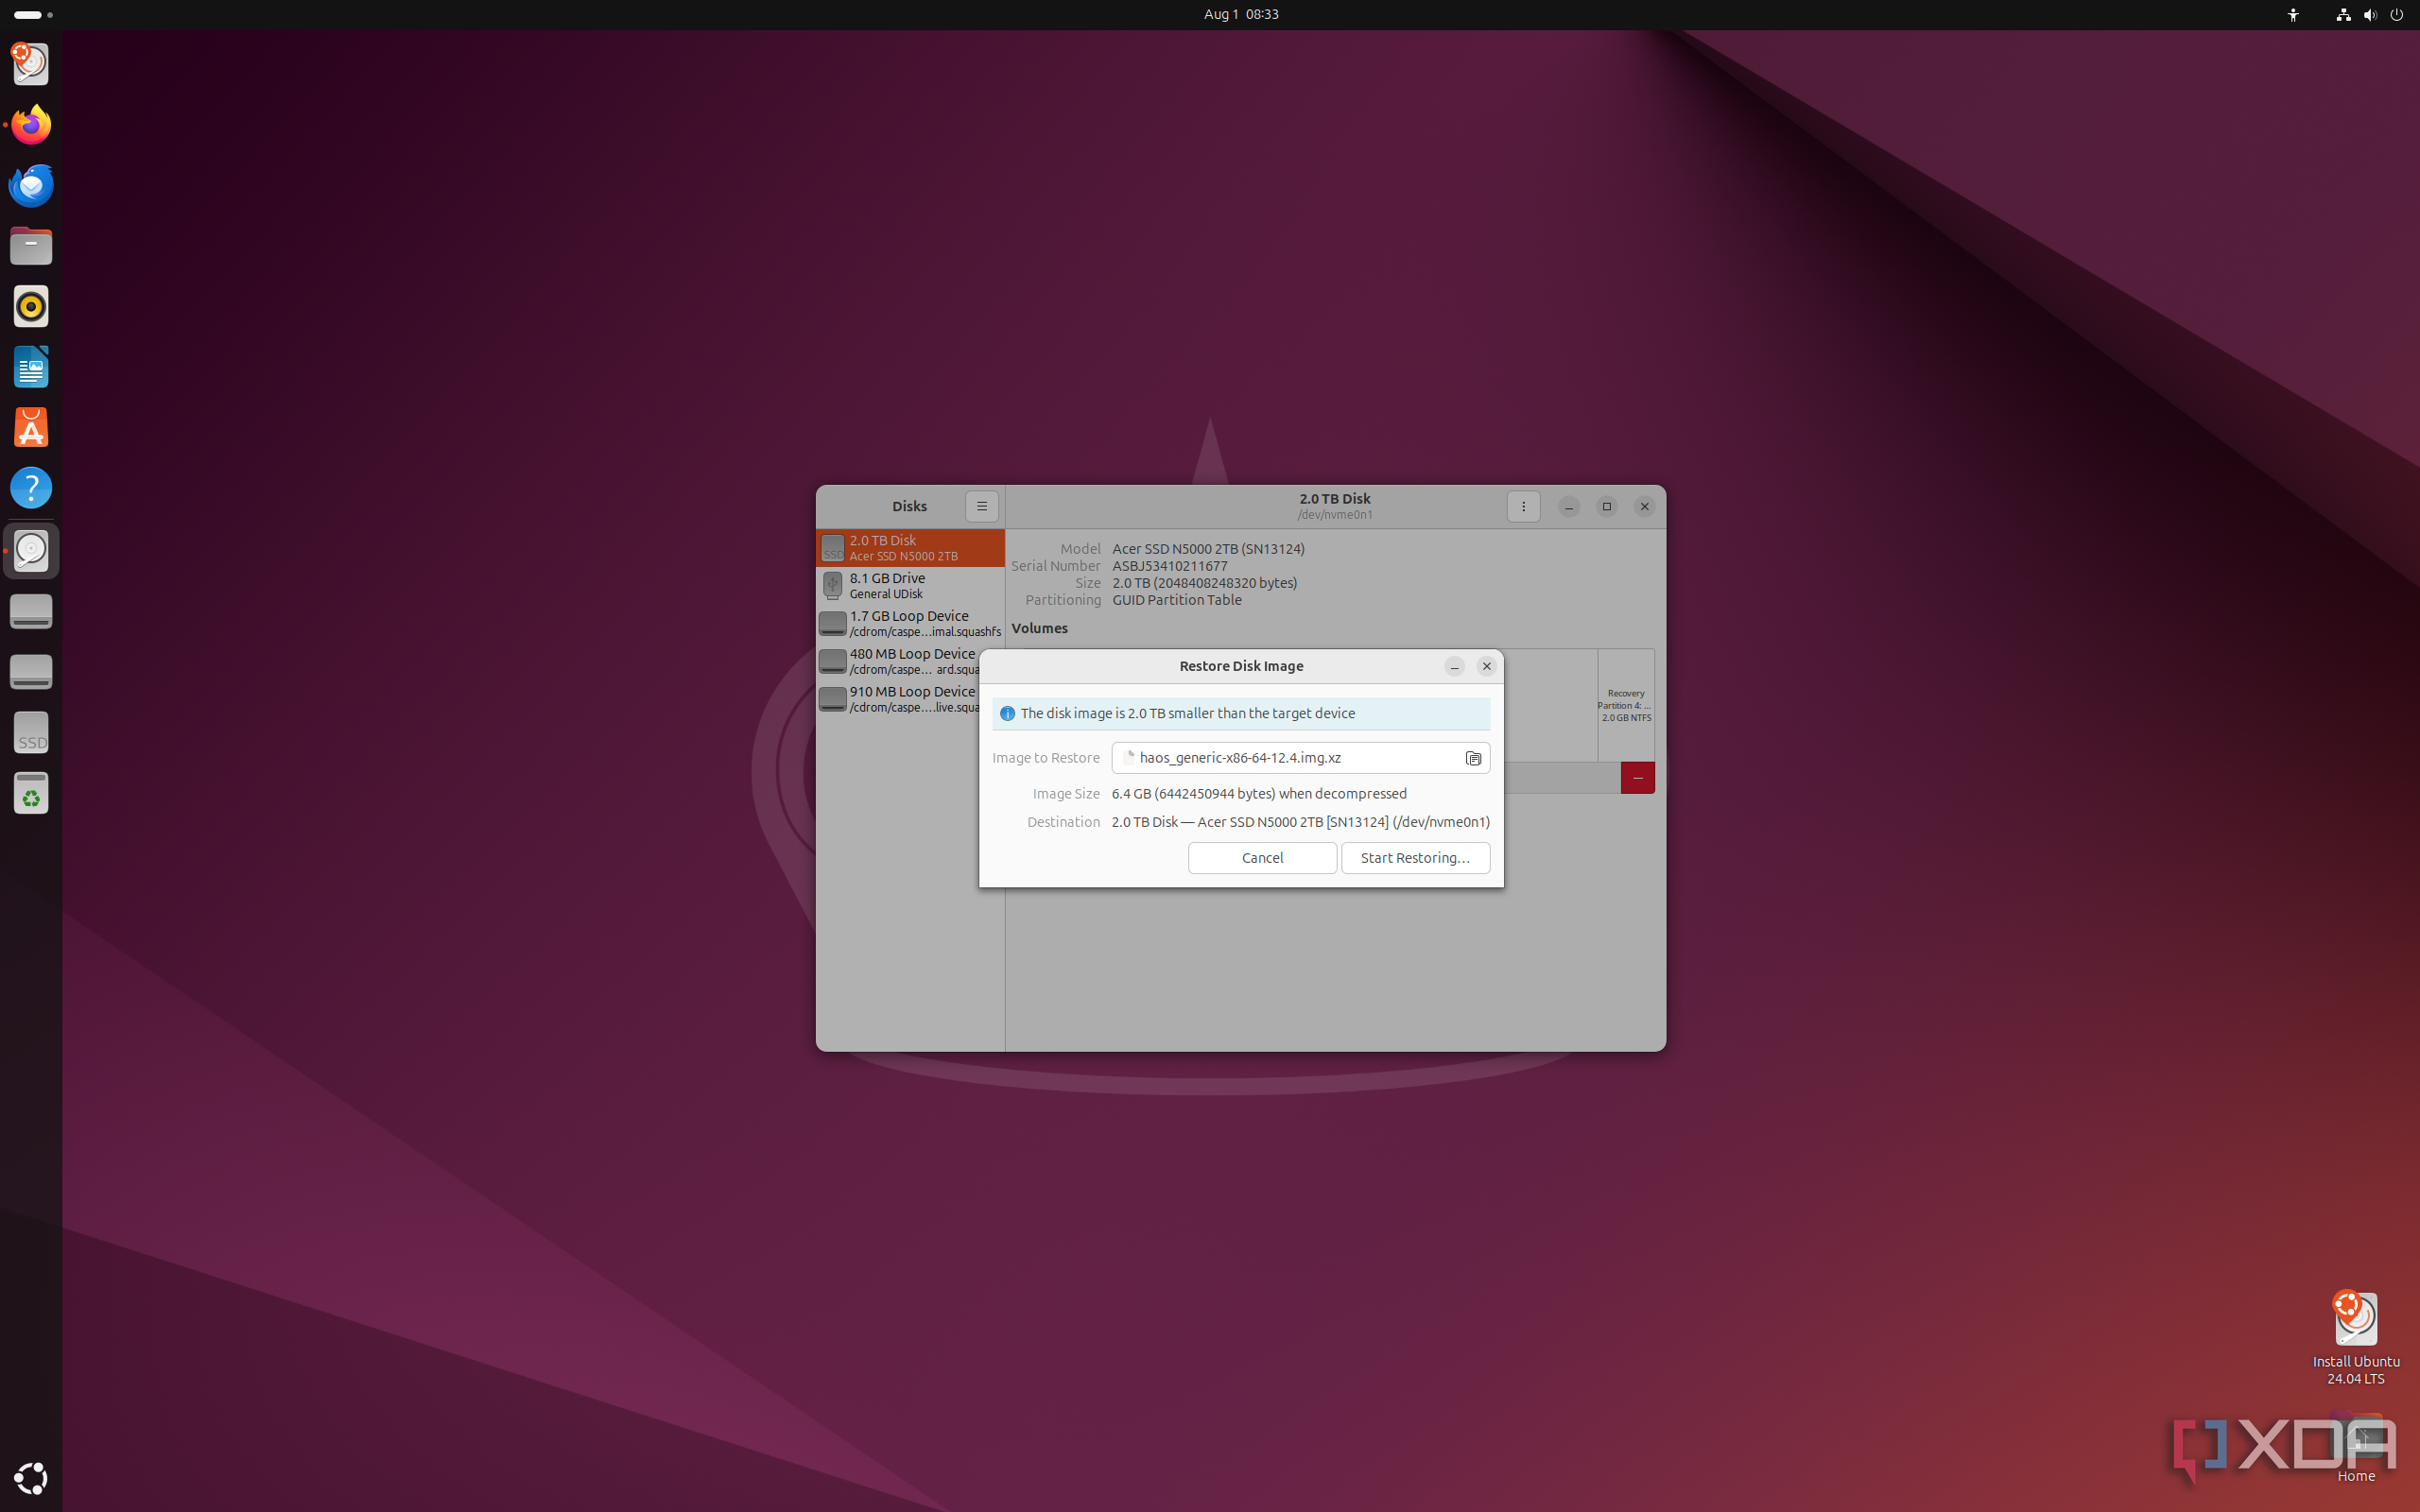
- Select Restore one more time to confirm.


Wait until the restore operation is complete, then use the power menu in the top-right corner to turn off the computer. Remove the USB drive, then turn the computer back on. Home Assistant OS will boot up, and start downloading packages it needs from the internet. Eventually, it will be completed and load into the dashboard.

Related
I control Home Assistant with my voice – here’s how you can too
Level up your smart home experience by adding voice control functionality to Home Assistant
Installation in a virtual machine
Home Assistant can run in many ways
While it’s true that Home Assistant OS is the best way to run things, as that’s the option with the most functionality, nobody said that it has to run on its own device. Instead, you can run Home Assistant on a virtual machine and install it on an old PC, on NAS hardware, or on the PC you use daily, and it will still be able to control your smart home. Using your virtual machine software of choice, you’ll need a virtual machine for a Linux-based machine that has an internet connection, at least two virtual CPUs, 2GB of RAM, and 32GB of storage.
You won’t have to go through the ISO install process either, as Home Assistant has full system disk images for the most popular virtualization software:
Setting up Home Assistant
Find your smart home devices and link them
Once you have Home Assistant installed and ready to go, actually finding your devices and linking them is relatively easy. That does depend on what smart home systems you’re using, as some are more involved in connecting to Home Assistant, but many of the more popular devices are automatically picked up and integrated. The general set up process for those that are automated looks like this:
- Open a web browser and go to homeassistant.local:8123. Sometimes this doesn’t work, and you have to put in the URL of the device running your Home Assistant instance.
- Select Create my smart home to get started.
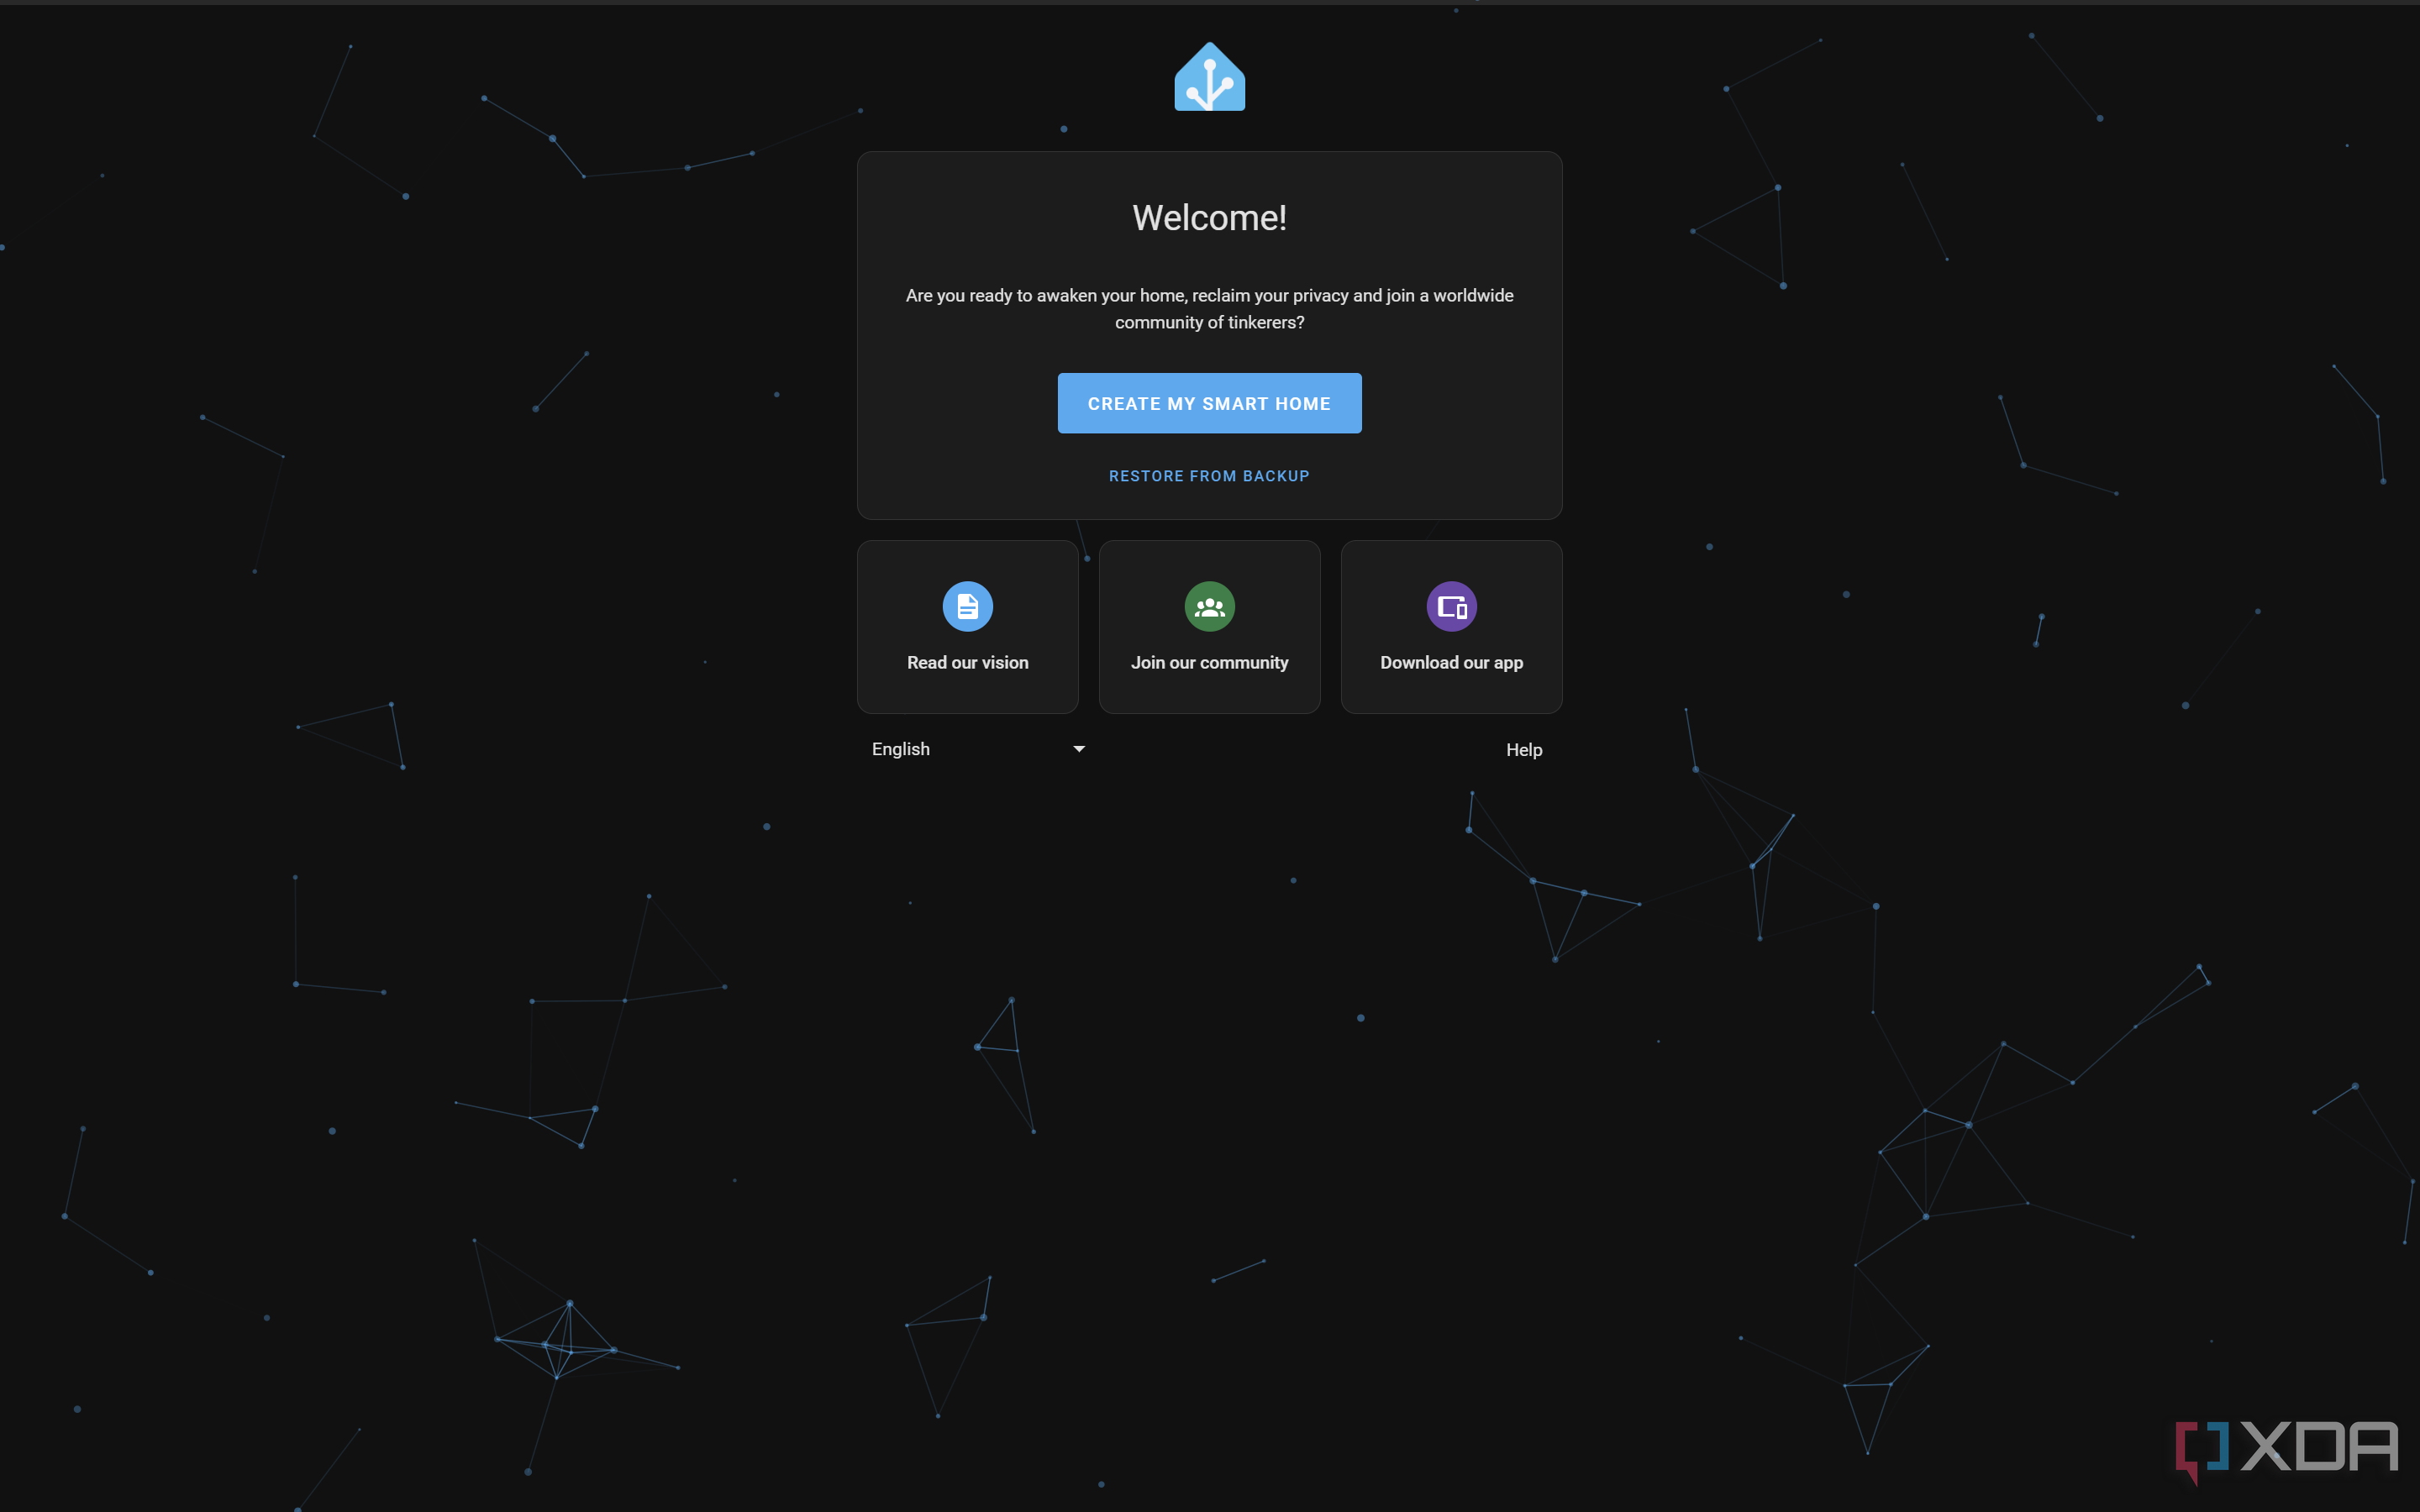
- Enter your desired account name and choose a password.
- Select a location for your home, so that Home Assistant can give you weather information.
- It will ask you if you want to share data with the Home Assistant developers. It’s your choice, and the default is not to share.
- Home Assistant will now detect any devices in your home. Select Finish, and every device found will be added to your dashboard.
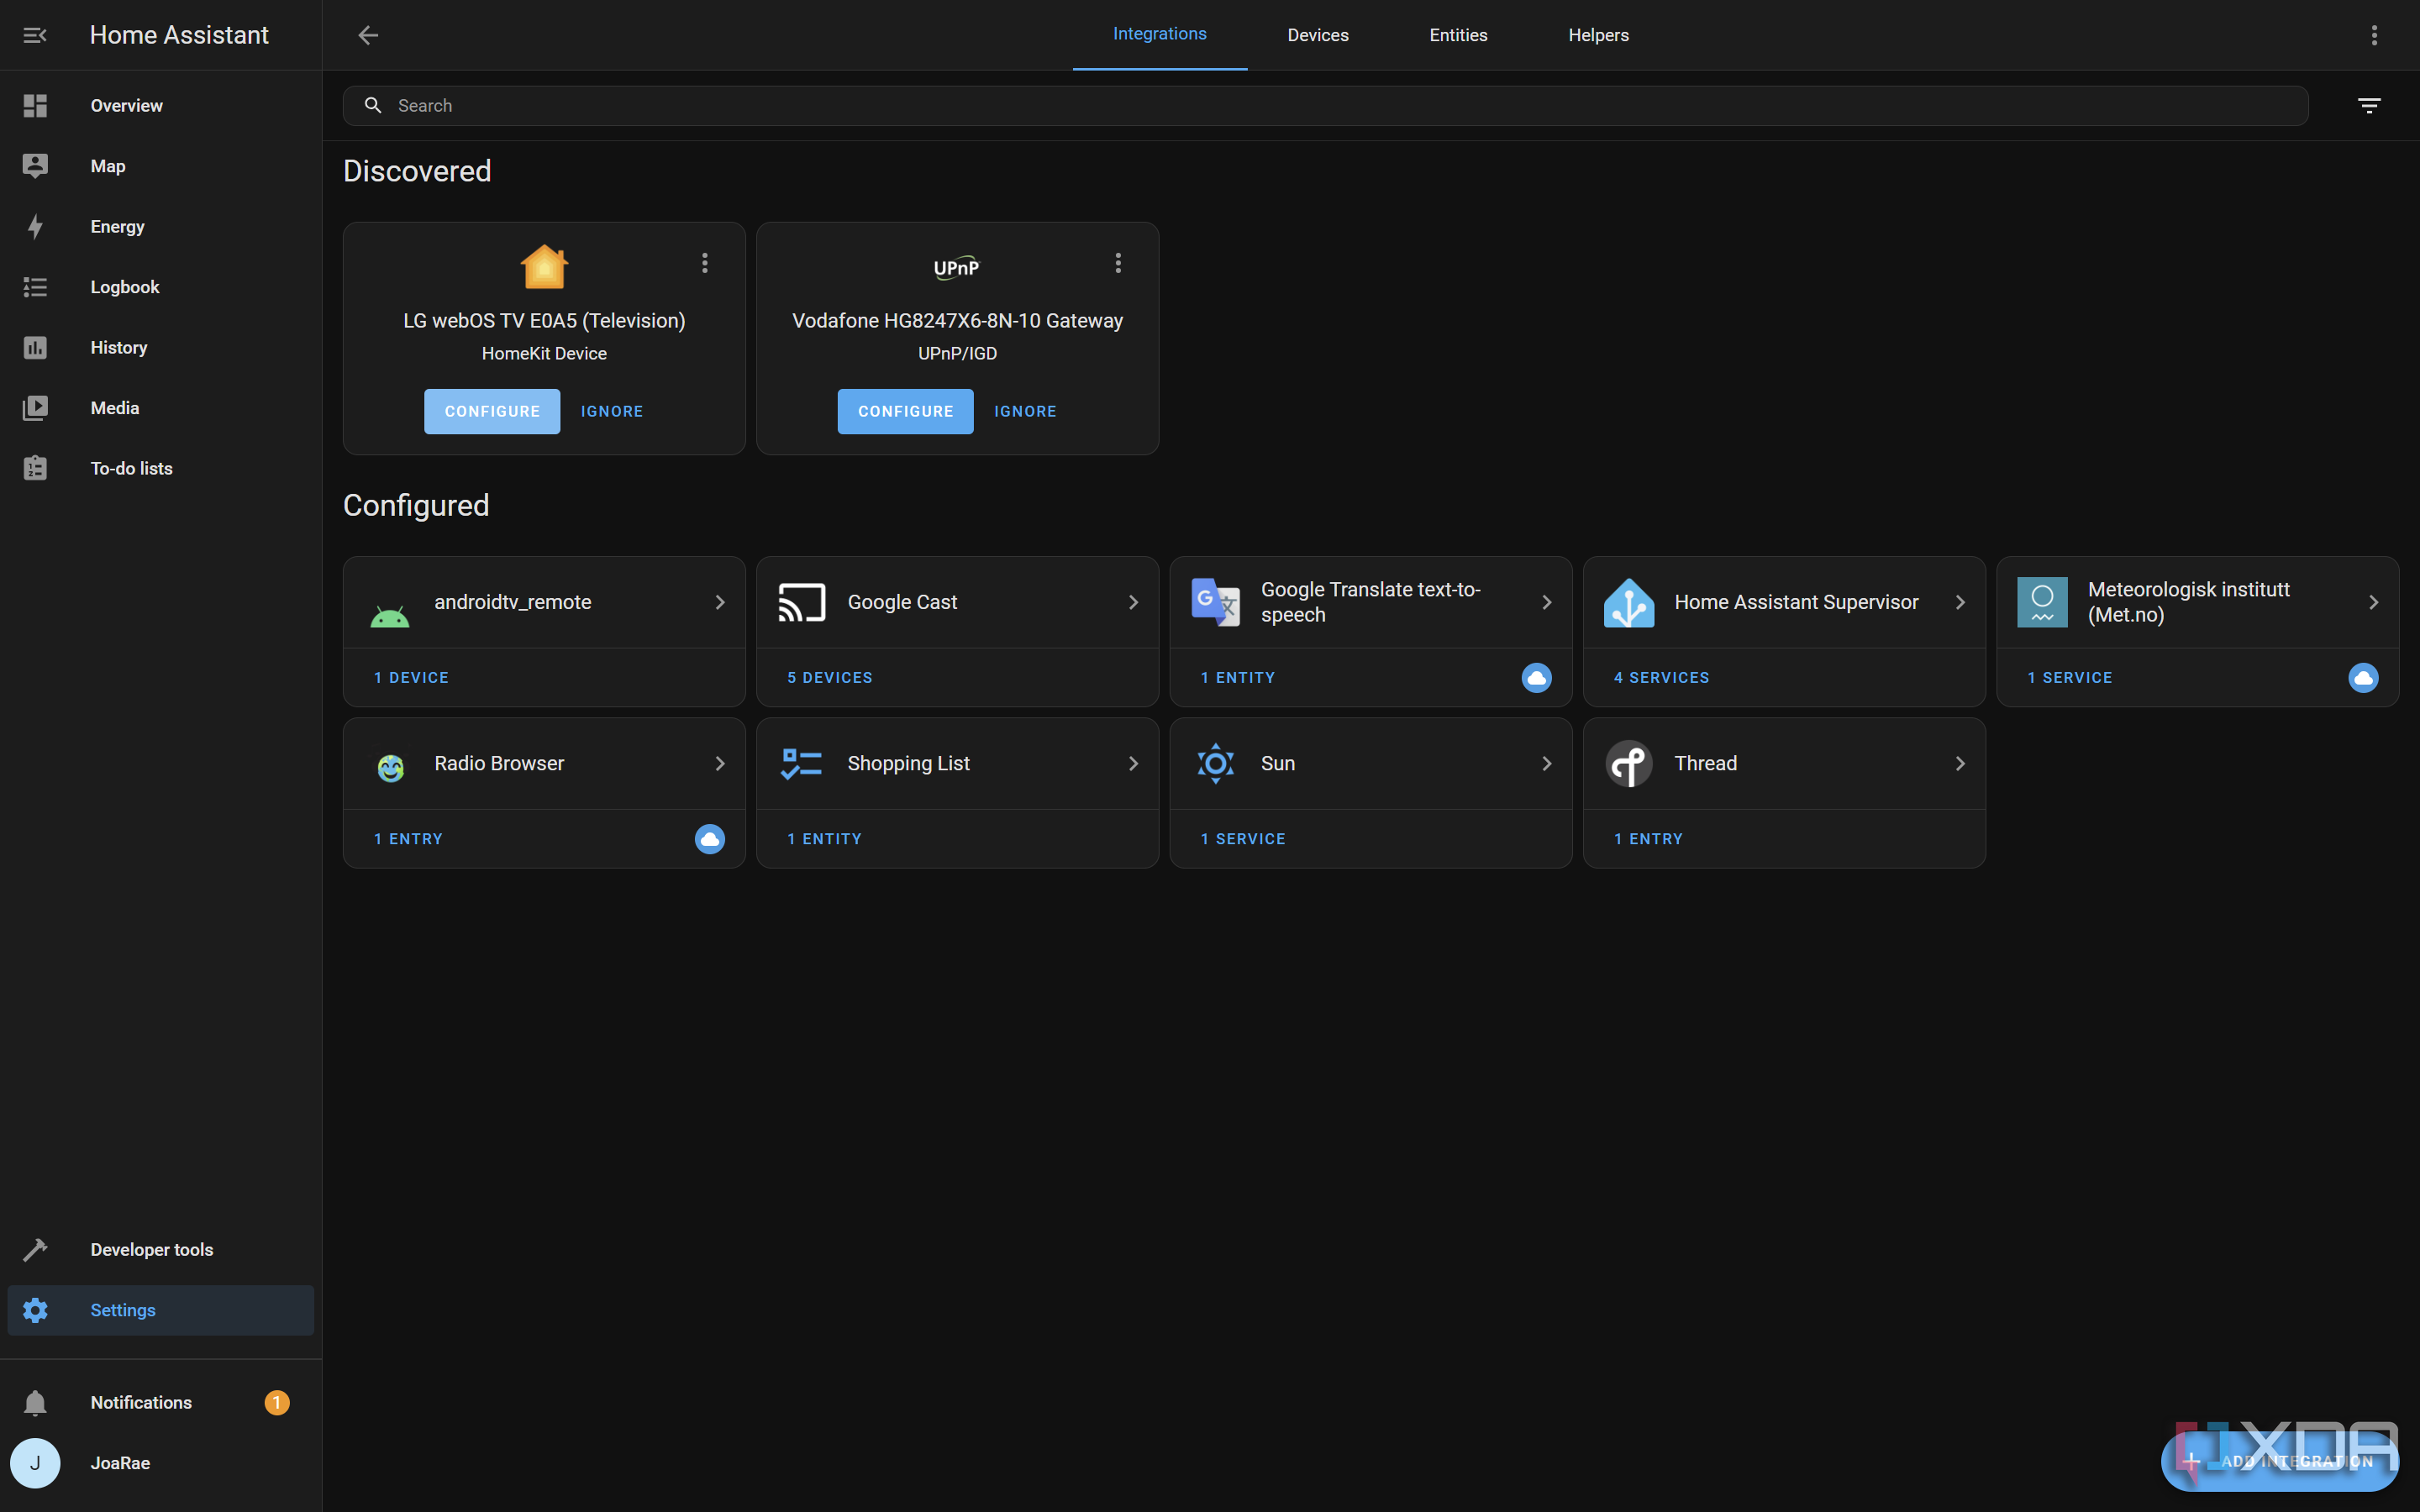
Not every smart home device with a Home Assistant integration can be added automatically. Some need to be manually added, and the individual integrations will have a help document to walk you through the process.
- The Settings tab is where you can manually add more integrations or automation, configure existing integrations, and more.


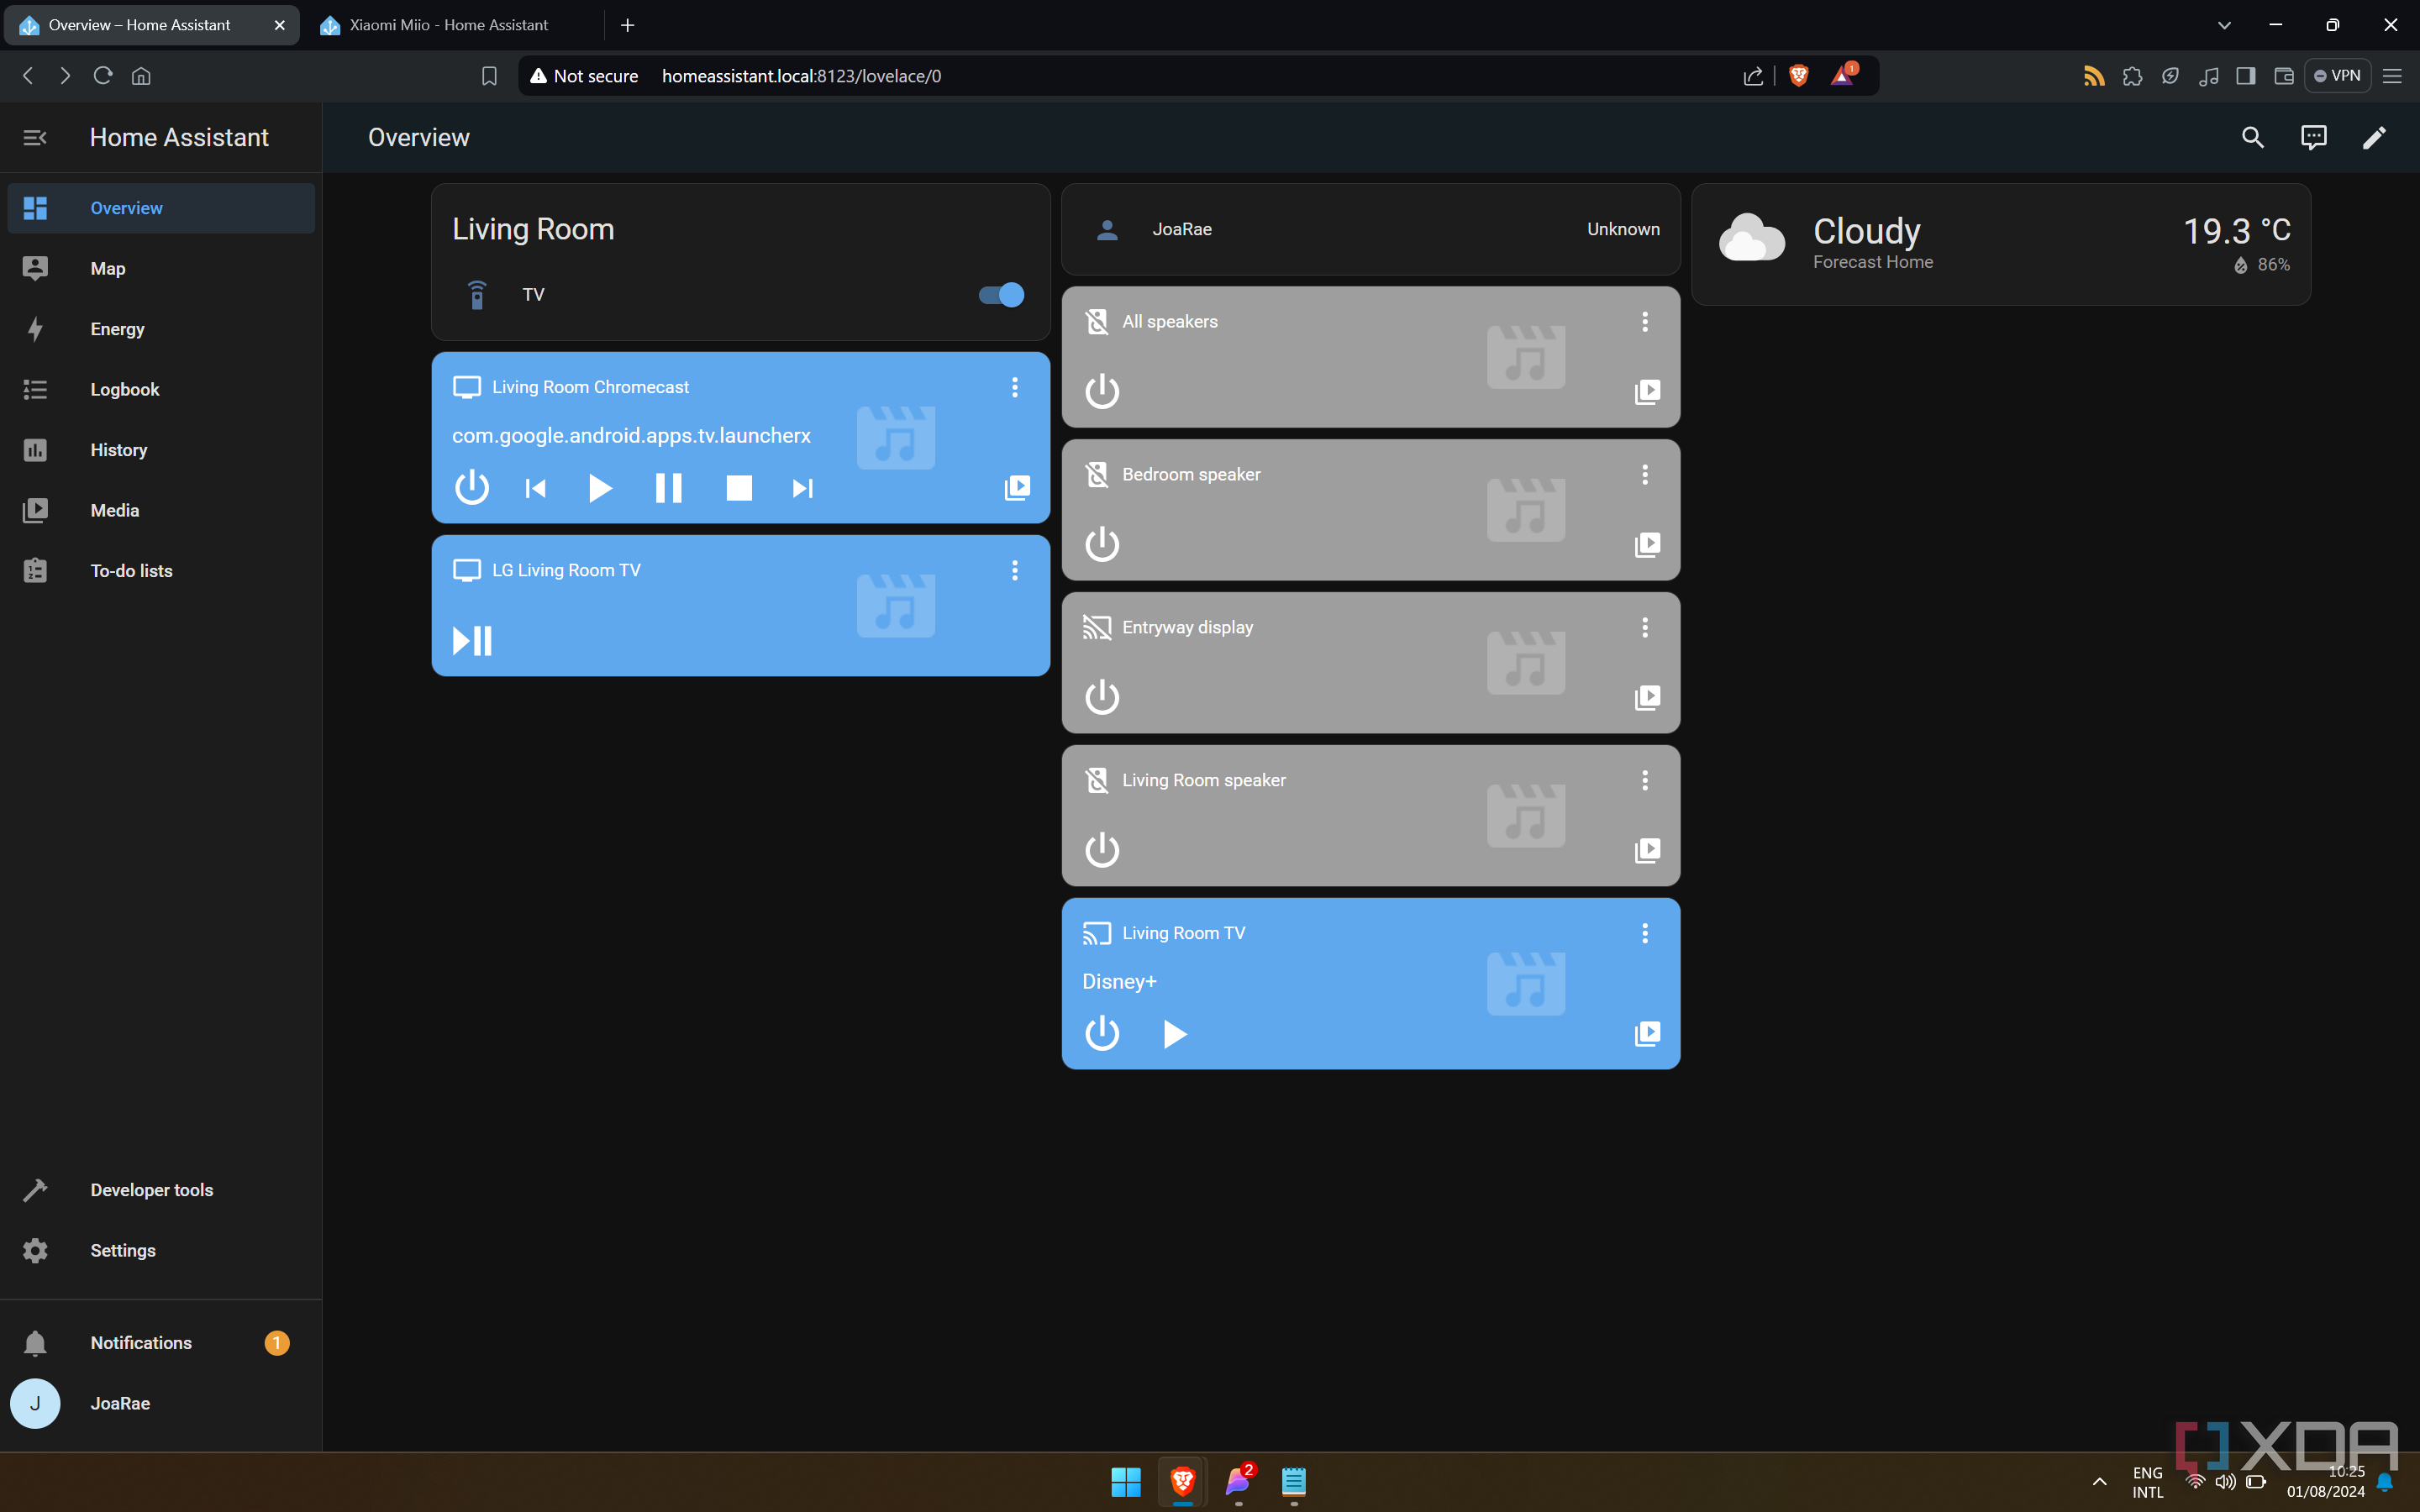
Now your Home Assistant is running, and you’ve likely got the bulk of your smart home devices connected. There is a wide range of things you can do with it now, including linking together systems and services that have no native linking, or adding things like presence sensors to control lighting, music, and more.

Related
10 of the best add-ons for Home Assistant
Boost the capabilities of your smart home with these amazing Home Assistant plugins
Once Home Assistant is running, there is so much more you can do
Home Assistant is one of the best ways of taming the various smart home ecosystems that many homes have installed. It uses the official APIs of those smart device manufacturers, so you can be sure it will perform in the same way that the official apps do while being able to control them all from one dashboard. You can also set up a VPN or Tailscale instance and access Home Assistant from anywhere. There is a ton of integrations and automation available, and you can even write your own if you want to connect things like presence sensors to control chains of smart home actions.

Related
How to connect Jellyfin to Home Assistant and all your smart devices
Get the best of both worlds by adding Jellyfin to Home Assistant.
link


